Create your own website using Hugo on MacOS
HTML.
1 Introduction and Overview
Building a generic website from scratch is a tough work. However, personal websites for blogs, a special type of website, is actually programmatic. Hugo provides a convenient building templates for that. To make a new blog in Hugo, one could only just create a new folder, write a markdown file (in a specific format) and that’s it. You don’t need ANY knowledge about HTML or CSS. Well do you need to buy a domain name for everyone to see your posts? Well, GitHub Pages is a free service where you just push some contents in a repository of your own with some extremely easy command line, you created your sites of names like yourname.github.io.
2 Tools needed
2.1 Homebrew (Packet Manager)
We will use a packet manager called Homebrew to install Hugo. Follow the commands here to download Homebrew first, or you can execute:
/bin/bash -c "$(curl -fsSL https://raw.githubusercontent.com/Homebrew/install/HEAD/install.sh)"Once downloaded, if you don’t get any error by entering this in the terminal in any folder, you installed it properly (Install testing):
brew --version2.2 Git (Version Control System)
You can use Homebrew to install Git:
brew install git
git --version # install testing
3 Install Hugo
Run this in any folder:
brew install hugoInstall testing:
hugo version4 Run Example Theme
4.1 Create Framework
Enter the terminal in any folder, you will be creating another main folder called mysite in it. Folder mysite will contain all the contents that are relevant to your website:
hugo new site mysite
cd mysite
Folder mysite should look like this:
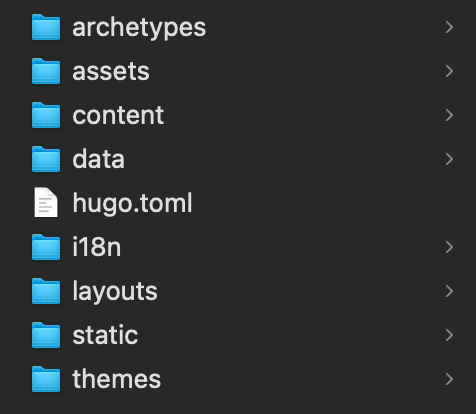
mysite folderwith most folders in it empty. This is the framework.
4.2 Choose Theme
The themes folder is empty, now we will add some code representing a theme inside it. Now choose a template here and downlaod its source code folder inside the themes folder. I use Stack
cd themes/
git clone https://github.com/CaiJimmy/hugo-theme-stack.git # Replace as needed
4.3 Run Theme
Now there should be a folder inside themes. Now copy all the things inside a folder like exampleSite into the main mysite folder (‘’replace’’).
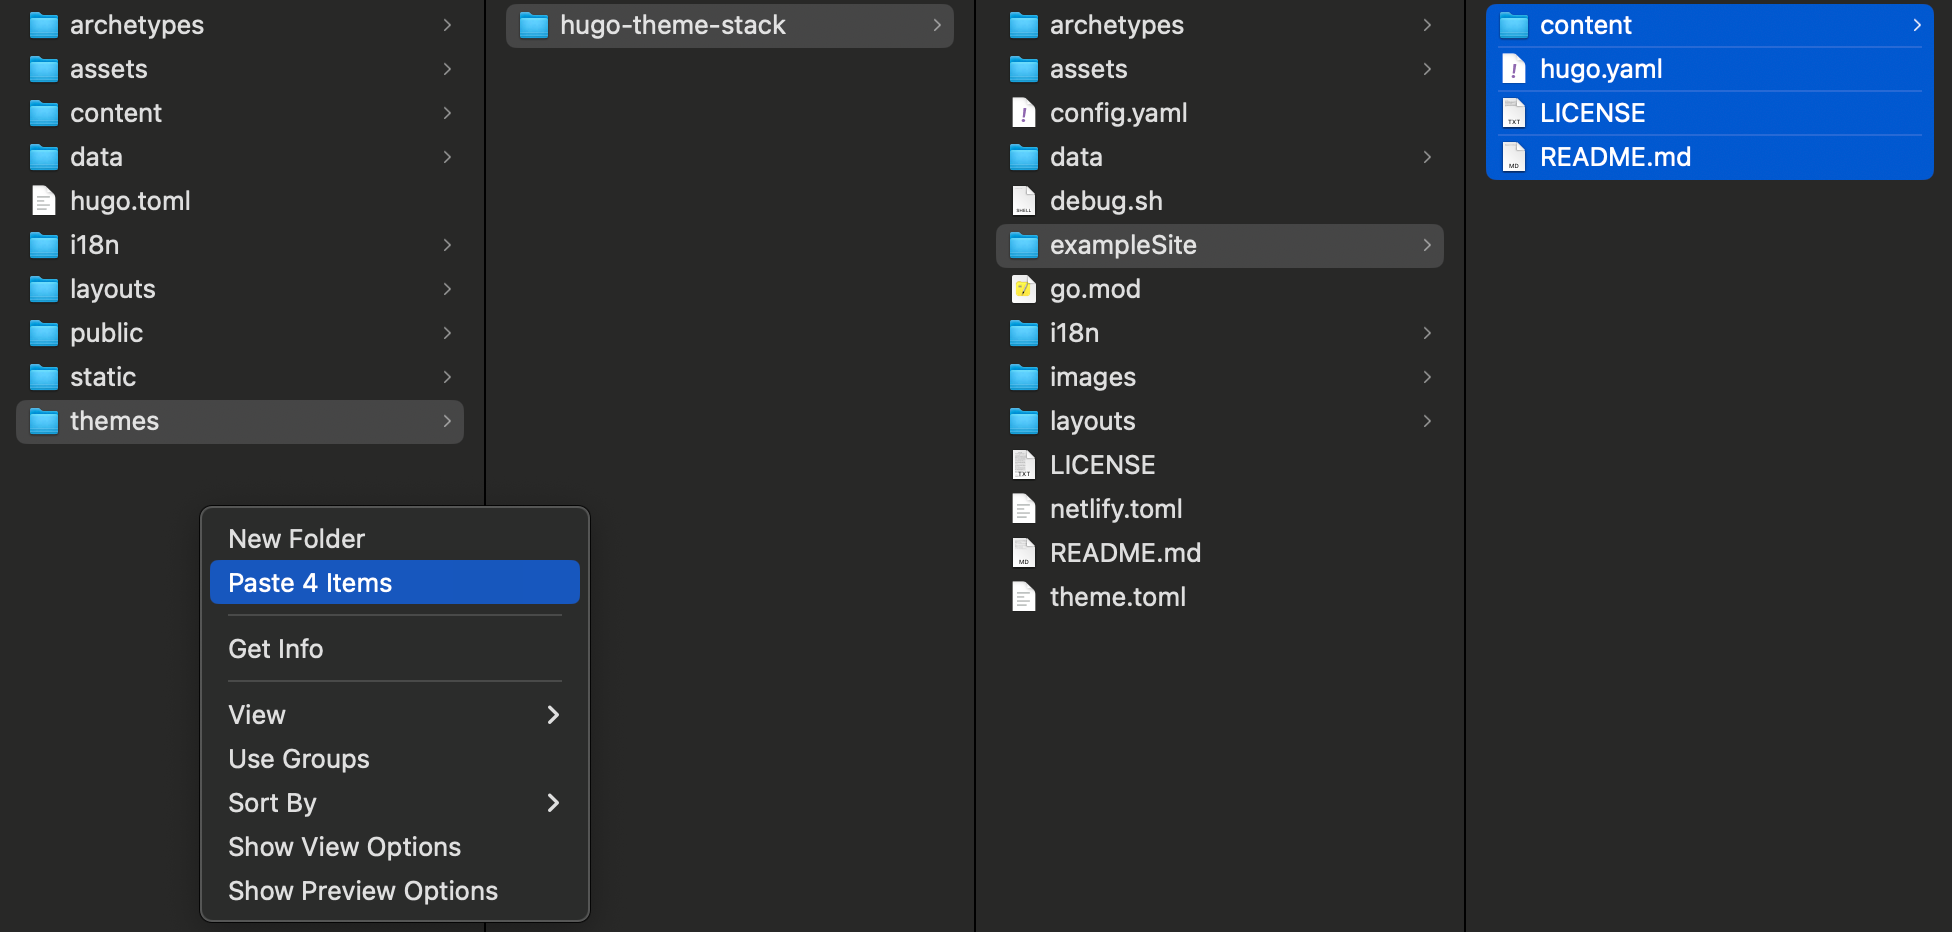
exampleSite into mysiteGo to the main mysite folder and remove the original hugo.tomal file, or you can do:
pwd # should be in "mysite"
rm hugo.tomal
Then (in mysite folder), run:
hugo server -Dit will prompt something like:
Built in 865 ms
Environment: "development"
Serving pages from disk
Running in Fast Render Mode. For full rebuilds on change: hugo server --disableFastRender
Web Server is available at http://localhost:53844/ (bind address 127.0.0.1)
Press Ctrl+C to stop
Enter the link provided (http://localhost:53844/). You are done!
5 Play Around
This is easy, just compare the contents in each folder and the website and modify things a little.
6 Publish your website
Note the link (http://localhost:53844/) is private and cannot be visited on other devices. So follow these steps to publish it:
6.1 Create GitHub Repository
Go to your GitHub page and click ‘+’ on the right upper corner, choose New repository and name it like this:
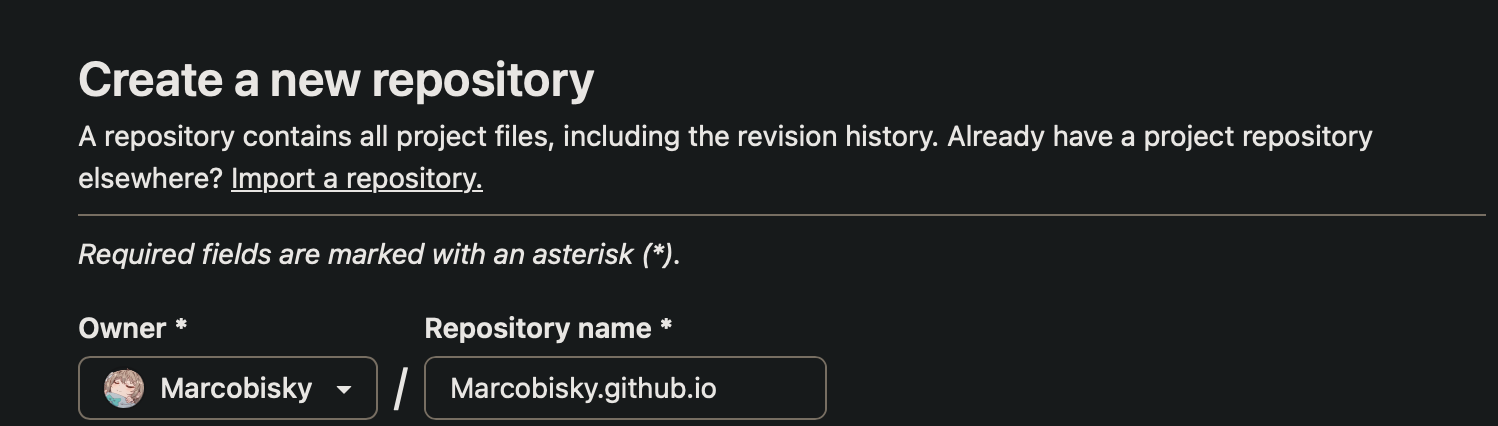
i.e., yourname.github.io, which will be your own domain name.
6.2 Push Contents
Run this:
hugo --theme=hugo-theme-stack --baseURL="https://yourname.github.io/" --buildDraftsThen push the contents in your folder public on it by:
cd public
git init
git remote add origin https://github.com/yourname/yourname.github.io.git # change as needed
git add .
git commit -m "Initial commit"
git push -u origin main
You can access your website on https://yourname.github.io/ within several minutes.
6.3 Notes
After you change contents locally, the contents on https://yourname.github.io/ will not change automatically, you will have to push it on GitHub again:
cd public
git add .
git commit -m "Add something new"
git push origin main
Also the public website will not update instantly, you will have to wait several minutes.